Click here for a version of this document with smaller screen clips.
A Student Guide to WHS
B. Accounts/Account Maintenance
E. Add/Drop and Changing Sections:
Submitting
a hand-graded assignment
Collecting Instructor’s Class Downloads
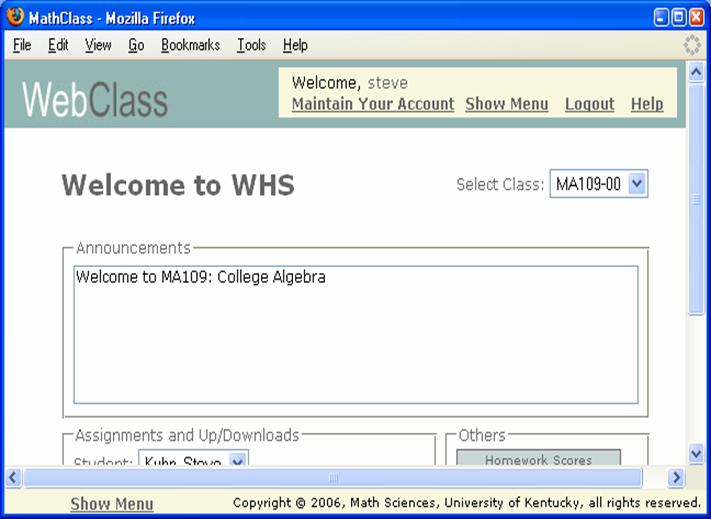
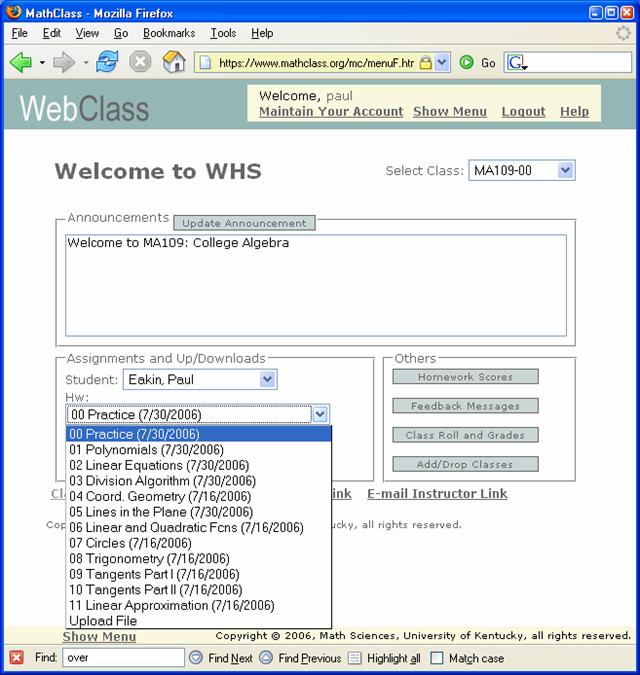
This guide assumes that you have logged into WHS at http://www.mathclass.org and are either enrolled in a WHS course or have requested enrollment through WHS Add/Drop. Upon logging in you will arrive at a course web homework page of the type displayed below. Here we have labeled the various components of the page. In what follows we will briefly describe their individual functions.
Annotated WHS Main Page
A. Class Announcements. Check here for routine announcements by your
instructor. Some types of information that might appear here are: adjustments to assignment due dates, notes on articles found in the classroom, announcements of the curve on exams, etc.
B. Accounts/Account Maintenance. Since it is possible (but neither necessary nor advisable)
for an individual to have more than one WHS account at any one time, it is important that students know how to
maintain their accounts and how to identify the account that is registered for
a particular course. Once it is
provided, a WHS
account is uniquely identified by its “registered email address”. If your account was created for you by the
WHS system (e.g. when you pre-register for a course) then you must provide
email address by using “Maintain Your
Account” tools page. There you can
change the email registered to your account at any time and whatever you last
provided will be the
registered email for that account until you next change it. Since
it uniquely defines an account a particular email can be associated to one and
only one account at any time. In
particular, you cannot have two accounts with the same email.
Accounts rather than people register for courses.
Technically, it is an account (owned by you) that is actually recognized by the
system – not you
personally. Thus although you can create
other accounts and even use “drop/add”
(See “E”) to add your
class, only the work that you do in one
of them will be recognized as “official” work for a particular class.
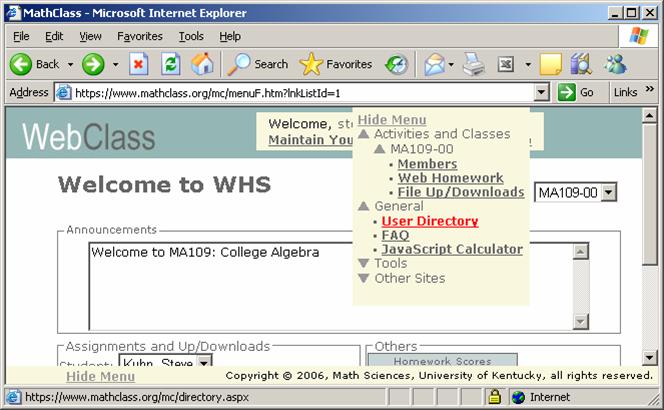
To see if you have multiple accounts participating in a particular course go to yellow menu (“F”)
and, if it is not already open, expand
the “General”sub-menu by clicking on its triangular
link. Select User
Directory and enter your last
name and press “Get Account Information”.
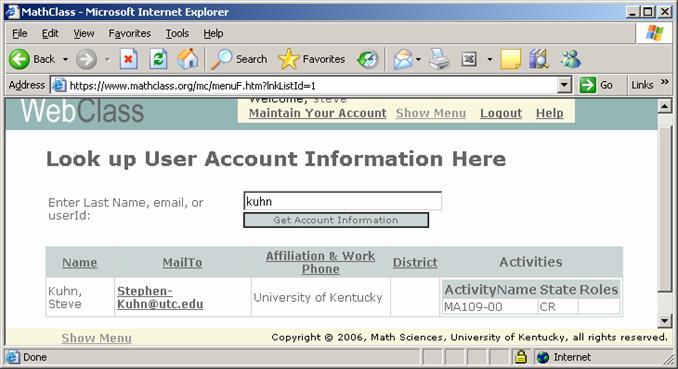
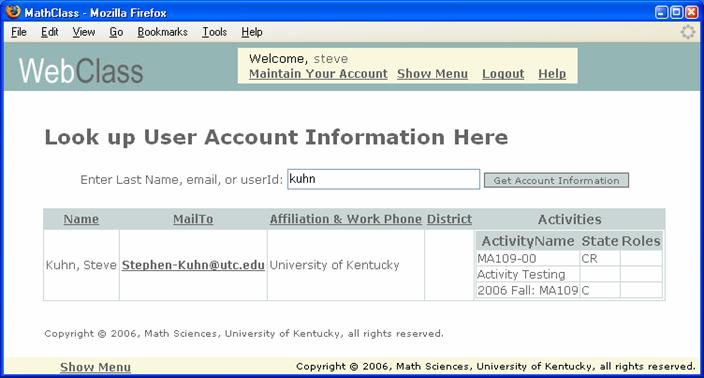
The example below shows that Steve Kuhn has applied to (the “C” under “Status”) and been registered (the “R” under “Status” ) in MA109-00.
The listed email address uniquely defines that account. If Steve had two accounts registered for
MA109-00 they would both appear on this list with different email addresses.
Were that the case Steve should ask the instructor to de-register the extra
account. Once de-registered the account
would no longer appear in the “Registered
Students Only” list and would be added to the “Applied Students Only” list.
At that point Steve could log in with the extra account and drop the course in
“Add/Drop”.
Student Accounts Disappear After Every
Semester. Unless you have arranged
for it be retained your student WHS account will be deleted at the end of each
semester. If you need an account in a
subsequent semester then you (or the WHS system) will create it.
Top Annotated Main
Page
C. Help:
The WHS Help system is for help with the system itself and not for help
with courses or homework. See “I” and “J” for electronic
tools to send course-related questions to your instructor. See “K” and “L”
for course and class web pages with office locations, office hours,
phone numbers, etc.
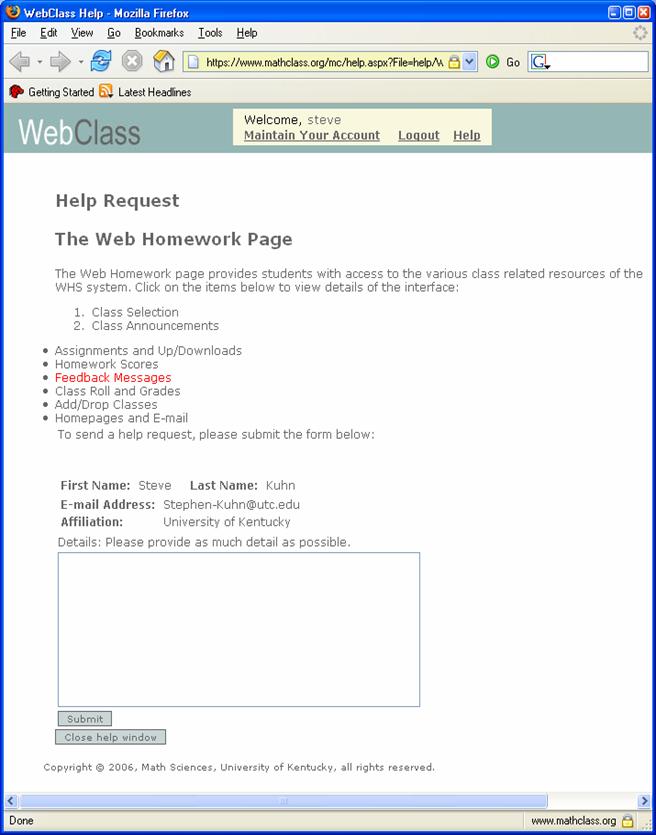
Every page in WHS has a Help link in the page header at the right of the light-colored “Welcome
” area. These links reference “Help Pages” which (a)
contain information about the various functions of the particular page and, (b)
contain a text box which you can use to
report problems with or address questions about the WHS system to the
system developers (who are all at the
If you use the Help system to report a problem or ask a question the system
developers will respond via the registered email address for the account you
were using.
D. Class selector. It is not uncommon for a student to be taking more than one class which uses WHS. To move from one class to another simply choose the class you want to go to in this menu.
E. Add/Drop and Changing Sections: At “Add/Drop” you can add any course in WHS, including courses at other
institutions. However, adding (or
dropping) a class in WHS has nothing to do with “officially” adding or dropping
the course through the office of the registrar.
When you
“add” a course at “Drop/Add” you select the institution and class in the “Add a Class” table then
check (or don’t check) “For browsing”, and then press “Add Class”. The system will report “Class added
successfully” if it is able to process your request or “Could not add class” otherwise. The most common reason for the
negative result is that you are already registered in the class.
If you don’t check “For Browsing” then your status relative to the course is “applied”. If you are “applied” the instructor can, at his/her discretion, shift your
status to “registered”. If you do check “For browsing” then the instructor does not have the option of fully
registering your account for the course.
Once the system reports your success in adding the class, it be listed in the
Class Selector (“D”) menu on your WHS main page and you
immediately have the ability to view class materials and submit the
machine-checked assignments. The results
of such submissions will be reported to the instructor when (and if) he/she completes
the registration. The results
will be treated as if you had been fully registered from the time
you “added” the class. If you apply “For Browsing” you can subsequently apply for the
same course “for registration” .
The courses that you can drop appear in the “Drop a Class” list. You
can only drop courses in which your status is “applied” or “browser”. You
can’t drop a class in which your status is “registered” but the instructor can “cancel” your registration
by changing your status from “registered”
to “applied”. When he/she does this the course will appear in your “Drop a Class” menu and you can, if you
will, then drop the class. When you drop a class all of your records
for that class are deleted.
How to Change Sections: If you are registered in WHS in one section of a multi-section
course and wish to change sections here is what must be done:
A. Use the university drop/add to
change sections.
B. Log in to WHS and make sure that the old section appears
on the menu. Go to Add/Drop and add the new
section. At this point you can begin to do the class homework in the new
section. The new section will recognize any work done in the old section
provided the old section appeared on the menu when you logged in and the
homework sets in the two sections are the same.
C. When you go to new class,
speak to the new instructor and
tell him/her that you have added the section, and ask that the
instructor approve your WHS registration for the class.
D. Inform the old instructor that you
have dropped the section and ask that you registration in the old section be
cancelled. This can be done by email
(see “I”) .
E. The old class will remain on you menu
even after the instructor cancels your registration. To remove it from your
menu you must drop the class in WHS Drop/Add.
The old class will appear in your “Drop Class” list only after the old instructor has
cancelled your registration in that section.
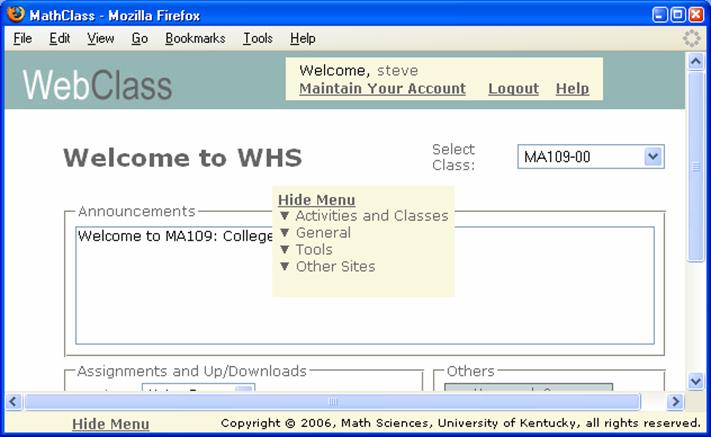
F. The Navigation Menu. The yellow Navigation Menu is tailored to
your account and changes as you add/drop classes or as your instructor makes
additional resources available. The menu
has a tree structure with branches indicated by triangular “arrowheads” to the left that are pointed
up if the branch is collapsed and down if it is expanded. “Leaves” on a branch are indicated by a dot (“ . “) to the left. Clicking on an “arrowhead” changes its
direction and thus expands or collapses the branch. Rather than an arrowhead the “root” of the tree has either “Hide
Menu” when it is expanded or “Show Menu”
when it is collapsed. When the root is expanded the menu appears in a
yellow rectangle that can be moved on the page. When collapsed it appears on
the both the “header” and
the “footer” of the page.
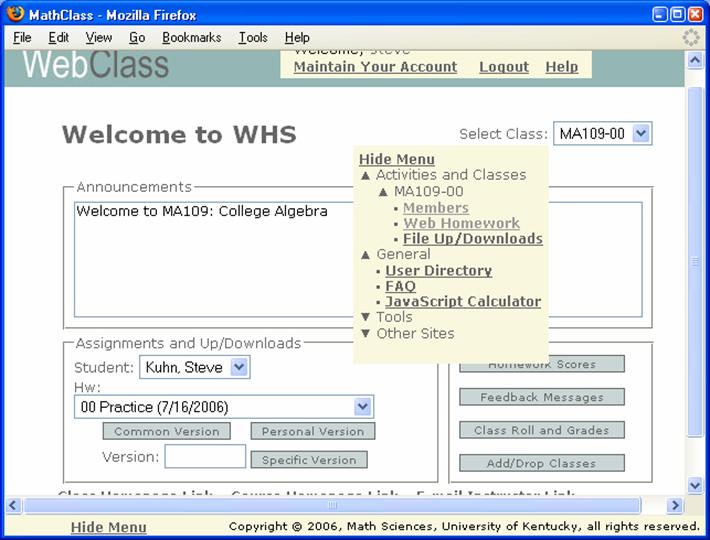
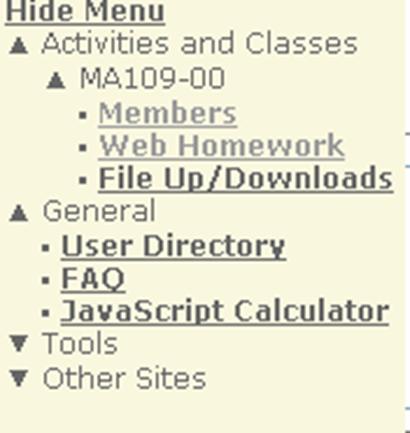
The image below shows a typical menu for a student registered in one class:
Ma109-00. For most students the only
parts of likely interest are: (a) the Web
Homework link
which takes the student to the WHS home page (the subject of this
document), (b) the Frequently Asked Questions (FAQ), a familiar construct,
and (c) the User Directory
which has been mentioned in (“B”). Of these we will describe only the User Directory in more detail.
The User Directory
can be used to locate people in the system and to determine which of their
accounts is involved in which activities with what status. Simply enter the person’s last name, email,
or userId. The latter is generally the institutional (non-social security number) student
identifier. In the example below Steve
Kuhn is in three classes: MA109-00,
Activity Testing, and 2006 Fall: MA109. The status “CR” for the first indicates that
he has requested (the “C”) and received (the “R”) registration. He has no status in the second which says that he is a browser there, and he has requested
but not yet received registration in the third.
The information in the table can be sorted (lexicographically) on any but the
rightmost field. This makes it possible,
for instance, to
search for people with common last names.
While the other
menu items are likely to be of limited interest to most, students are welcome
to experiment with any of these. Select and item and refer to the Help Page (“C”) for information.
Since they are displayed above we do mention the following three.
The Members and File Up/Downloads are present because some classes may evolve, grow
out of, or even run concurrently with other, broader activities. For instance, a group preparing for
a semester abroad may begin with an orientation course or courses in the
language and culture of the country of destination. Once the course is over the
group can use these other capabilities to remain in contact, collaborate on
other projects, etc.
The JavaScript Calculator is a
sophisticated tool for doing very high precision calculations. For instance the
command divisors(456677)
when evaluated in this program returns the fact that the only positive whole
numbers which divide evenly into 456677
are 1,13,35129, and 456677. Click on the link and use the “help page” and “library documentation” links
for documentation on the calculator.
Your instructor will tell you if it would be useful in your course.
G. Homework Scores: In WHS you receive credit for any problem
for which you submit an correct answer before the
assignment expiration date. However the
system reports your score on each individual submission. As a result your
cumulative score on an assignment may differ from (but is never less than) your
cumulative score on the assignment. You can check your results to date on any
assignment at the Homework Scores button. You can display of your status on an
individual assignment or
elect “Homework Summary”
for a table of your scores on all assignments.
To calculate your average on all of the problems on a set of assignments
check the assignments at left in the “Homework Summary” display and press “Calculate Percentage” at the bottom of the page. The percentage is displayed along with a
number of “Points” ranging from 0 to
10. The “Points” display is an
estimate of the number of homework
points that the student has earned on the next test for courses that count
scores on particular sets of homework leading up to a test as 10% of the test
grade. This system may or may not be used in your class. Check with your
instructor.
Although no courses at
H. The Class Roll and Grades button
opens a separate window where you can check: (a) your exam scores, (b) scores on hand-graded
homework assignments the instructor has
you upload, (c) and the names and email addresses of others participating in the
course.
To check your exam scores press the
“Exam Grades” button at the top
of the page.
Note that you will generally need your course syllabus to translate “score”
into “grade”. Also, different courses
treat homework differently. In some
courses the homework grade is computed only as part of the final while in
others it is computed as a part of each exam.
In some classes there are grade components for contributions such as
class participation and reports which may also be determined on a course or per
exam Check your syllabus for the details as
to how any information on this page actually translates into course credit.
The “Class Roll” button opens a
separate window at which one can open lists of individuals participating in the
class, according to their status. If
you are participating for a grade be sure that your name appears once and only once under “Registered Students Only”!! If it appears more than once then you have at
least two accounts registered for the course and all but one of them need to be
removed from the “Registered” list. This
must be done by the instructor but you and the instructor need to agree
on which accounts are to be “de-registered” by the instructor. This will have
the effect of moving them
to the “Applied” list at which time you can login under these
accounts and drop (“E”). Note that the account under which you view
the list will have to the right of your name a “Get
Scores” button in the “Scores”
column. Pressing this button has the
same effect as pressing
“Homework Scores” (“G”).
When a “Class Roll”
list is displayed there is to the right of each name a 4 digit
hexadecimal number, the Account
Identifier which identifies the account which has opened the list. The
account identifier appears on the
“personal version” of each homework set
printed out from an account (see “M”)
I. The “Email the Instructor” link is used to send a direct email to your instructor.
J.
Feedback Messages. When the
homework system returns after you have made a submission it opens a window for
“questions or comments” below each problem for which you submitted a response
(see “M”). Your
messages are routed to your instructor or an assistant and the messages and
responses are tabulated on your “Feedback
Messages” page.
Questions for which there is a response are added to a table at the top of the
page. Click on the link at left to open a page with the problem, your question,
and the response. You can continue the
dialogue with the instructor(s) by adding more comments or questions and
pressing the “Record Response” link
at the bottom of the page. If you do it will be treated as an unanswered
question will drop into the “awaiting response” menu with the “Show Messages” link just below the “answered”
table. When answered it will re-appear
in the “answered” table. If either you or the instructor press “Mark as Read Without Responding” the dialog on that
question is over.
Older questions are dropped from the list after a time interval set by the
instructor. The default is 14 days. Once dropped a response cannot be
recovered.
Finally, there is a number on
your “Feedback Messages” button which tells you how many responses
you have that are currently unread.
K. Course Home Page. Many classes are individual sections of a larger course (e.g. MA109-00 is a section of MA109). The course home page is maintained by a faculty course coordinator who has overall responsibility. This page contains the information that is common to all of the sections. Among these is the course syllabus which the text(s), course content, how course grades are determined, dates and times of common exams, supplemental course materials, etc.
L. The Class Home Page is maintained by the instructor of an individual section. For instance the class home page of Ma109-00 would contain information about the instructor (e.g. name, office hours and attendance policies), policies for assignment of section-based course credit (e.g. quizzes and attendance), etc.
M. WHS Homework:
Versions/Homework Selection: To work
on your homework for a particular assignment, select it in the “Hw” line and
press “Personal Version”. Note that to the right of the assignment name
there is date which is the Assignment Deadline.
Results will be recorded only for work submitted before the deadline has
passed. In the image below the
assignment is “05 Lines in the Plane” and the deadline is July 30, 2006
Eastern (Daylight) Time. Since
work will be accepted until the deadline has passed the system will
accept work on this assignment through midnight on July 30, 2006.
There are also “Common Version” and “Specific
Version” buttons. Only work
completed on your
personal version of an assignment and submitted before the
deadline for that assignment is counted towards your course grade.
The following is a more detailed discussion of versions.
Homework
Versions: An assignment typically has from ten to
twenty different problems. There is a
fixed number (the multiplicity of the
assignment) of variants. For each 9-digit decimal number the system
chooses a particular variant of each problem and arranges them in some order
which depends on the number and specifications by the assignment developer.
This is the Version of the
assignment corresponding to that number.
The Personal Version of
an assignment is the version corresponding to (an expanded version of) the Account
Identifier (see “H”) of the account requesting the assignment.
Since all accounts have different Account Identifiers all personal versions of an assignment are
different. However,
for a particular account, since the system always knows the
Account Identifier, the “Personal Version”
button always returns the same homework assignment.
Since every student’s personal version is (slightly) different from every other
a teacher would not be able to respond to an in-class request from a student of the type
“Please do number five.” Since the student’s number five could be a variant of the teacher’s number
twelve. The solution to this problem is
the Common Version which
is the assignment corresponding to
-1. Everyone receives the same
problem set (version -1) on pressing “Common
Version”. Thus if a student wants
to discuss her problem five she determines which problem on the common version
is a variant of her problem five.
Suppose it were problem twelve. Her request to the teacher would then be
to discuss “problem
twelve on the common”, “common problem twelve” or something of the sort. Many instructors produce and distribute sets
of solutions to the common versions of problem sets.
The common version
returns the expected answer to a question any time an answer is
submitted for that question. The personal version returns the expected
answer once the deadline has passed.
Finally, anyone can view the
version of any problem corresponding to a particular number by
entering the number in the . Simply enter the number in the box by
“Version” and press the “Specific Version” button. Pressing “Specific Version” with no entry in the
box will return a randomly selected version.
WHS problem sets are designed with the expectation that students will print them out, work on them away from the computer, discuss them in class, and then use the computer to check their answers. To print your assignments select “Printer Friendly Version”. You will usually want to select “Show/Hide Selections” and “Add Page Breaks” (these are the defaults).

When working at the computer bring up the assignment and enter answers. There is a choice of formats to work in. “Text and Single Question” is popular. In any format click on the header button corresponding to a problem to bring it into the display area. Then add you answers. As you add information to a problem the color of the corresponding button will change to yellow, meaning that at least part of an answer has been entered.
When ready to check results
the “Go to Submit Button
Page” and press “Submit and Record
Results”. This can be done at any
time. The resulting page displays the
problems answered correctly and incorrectly, the problems that have been
answered correctly so far, etc. The
cumulative scores are found at “Homework
Scores” (“G”)
When a problem for which an answer has been submitted is revisited during the
same session the computer opens a comments box (see “J”) and for problems with multiples
answers reports the first part answer which is incorrect.
N.
Homework Assignments. The selection box under “Hw” is a menu of all available
assignments, listed with their expiration dates. The last entry is “Upload
File” at which the student can upload hand-graded homework assigned by the
instructor. The same menu may contain
instructor-provided Downloads
Submitting a hand-graded assignment
To submit a hand-graded assignment
first prepare and collect in one directory (folder) all of the files that make
up the assignment. Then make a zip
archive of the contents of the folder (not the folder itself). In Windows XP this can be done by selecting
all of the files, right clicking, and selecting “Send To” then “Zip Archive”
Collecting
Instructor’s
Class Downloads
Instructor can use the Downloads to distribute such things as supplemental materials and directions for assignments that are to be uploaded for hand grading. To collect a download simply select the item in the homework assignment menu and press the “Download” button. Downloads are very likely to be zipfiles which (in Windows) are opened by right-clicking on the file and selecting “Extract All”.
O.
Student Name . Make sure your name
is the one appearing in the “Student
Name” menu. In the past some students have started
working on computer sessions left open by other students and done their
homework for them.
Paul Eakin
August 19, 2006