and
Creating Menu Lists
Adding
a list to the Activity Menu
Building
Lists With the List Editor
WHS is organized as a connected tree with many levels of branching. WHS activities are level 1 branches.
A class is a special type of activity. Each
account is, at any given time, is a member of a
(possibly empty) subset of
the WHS activities. Membership in an activity affords an account
access to portions of the tree beyond the primary activity node. An individual account has a status and roles status
relative to each activity. Status and role determine the
account’s access to activity resources which lie further
out on the tree . The account’s activities and associated
resources are available upon login through its account menu which is a sub-tree of the site menu.
The owner of an activity (e.g. the instructor of a class) maintains a sub-tree of activity resources, called the Activity Menu. These sub-trees are defined in menu lists created in the Menu
List Editor. At the outset the
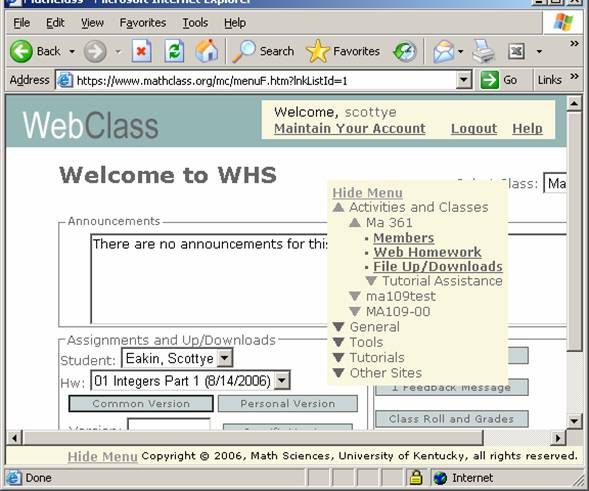
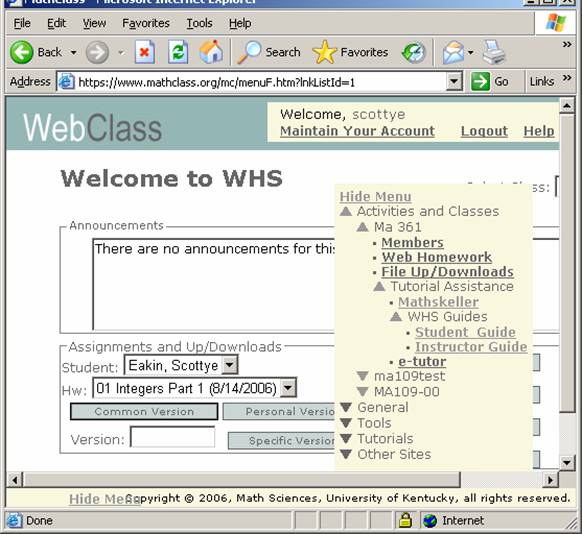
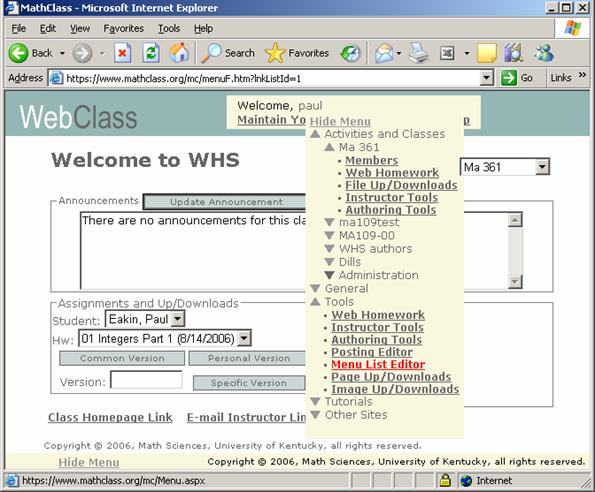
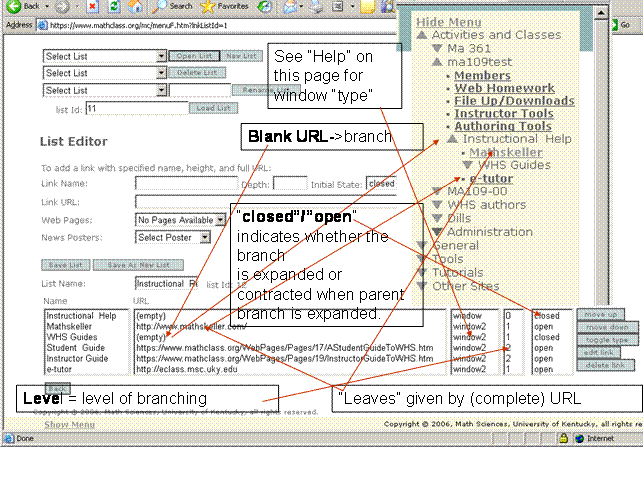
Activity Menu list is empty and the node at which it sits has no name. In the next two images the activity list a “Tutorial Assistance” link has been added to the MA361 Activity
Menu. Here “Tutorial Assistance” is the name assigned for the moment to
the Activity Menu. In the second image the menu is expanded to display the sub-tree which
has two leaves and one branch at level 1 (relative to the root) and
two leaves at level 2 on the level 1 branch.
Adding a list to the Activity Menu
Ignoring for the moment how they are made we can see that it is extremely easy to add a list to the Activity Menu.
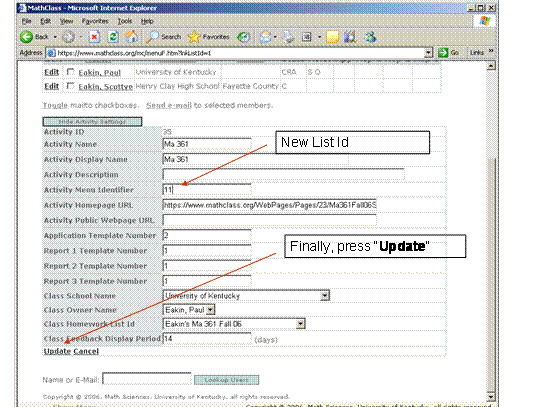
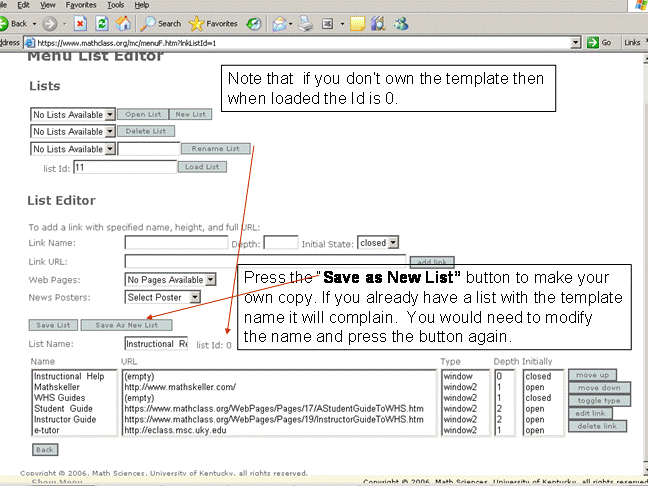
Each list has a unique List Id which is a positive integer. The list corresponding to the “Tutorial Assistance” item in the screen clip has List Id “11”. To append this list to the MA 361 class menu we do the following:
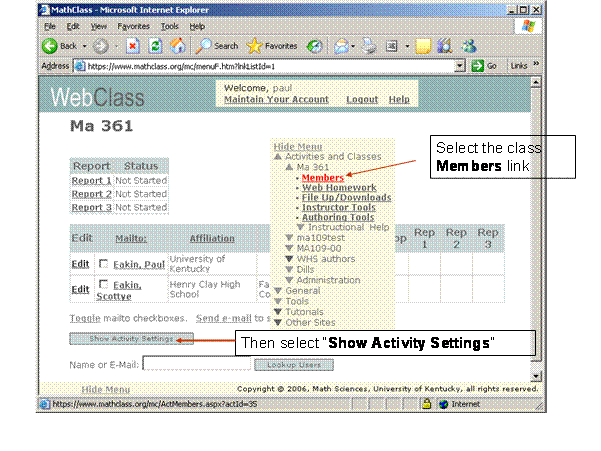
- At the menu select the Members link for the class. Then press “Show Activity Settings”
- Select “Edit” then replace the Activity Menu Identifier (initially “2”) in the image with the new menu identifier (“11” in the example)
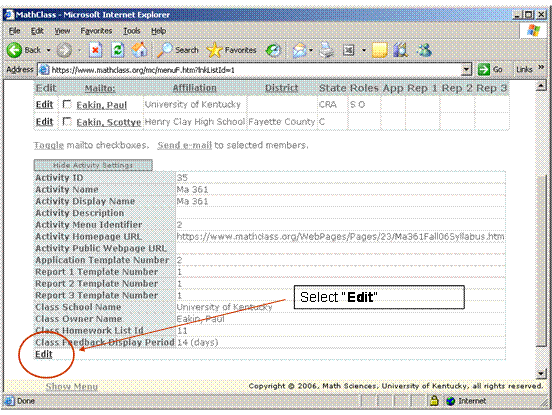
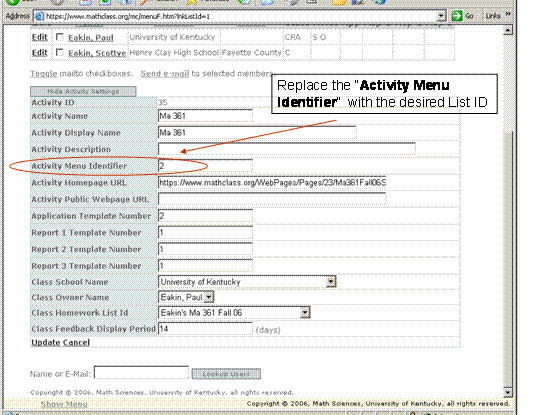
- Finally, press “Update”
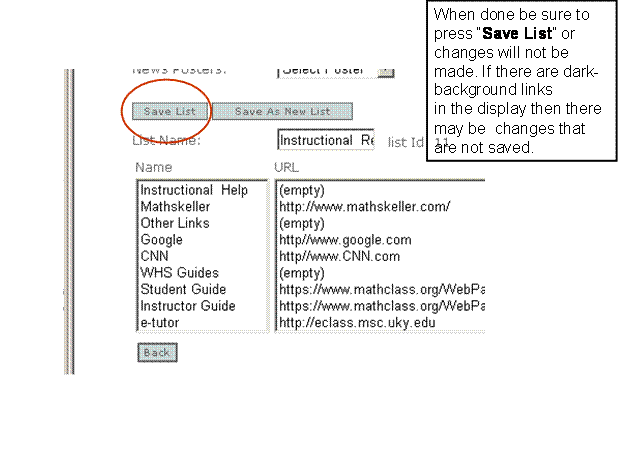
Building Lists With the List Editor
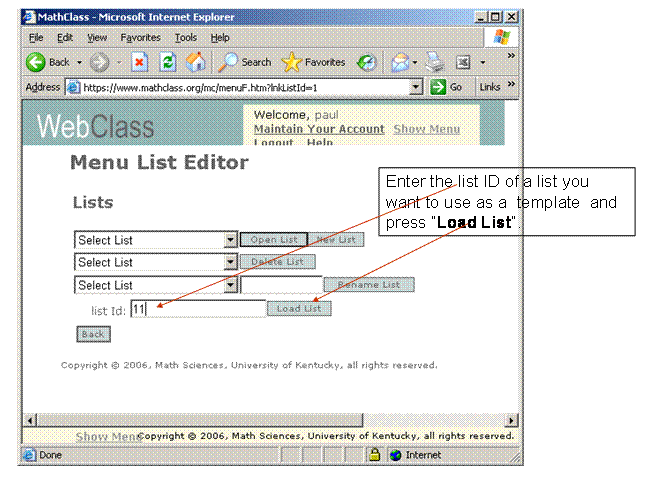
The Menu List Editor is under Tools on the main menu. The best way to build a list is to start with one that someone else has created, modify it, add it to a test class, and observe the effect.
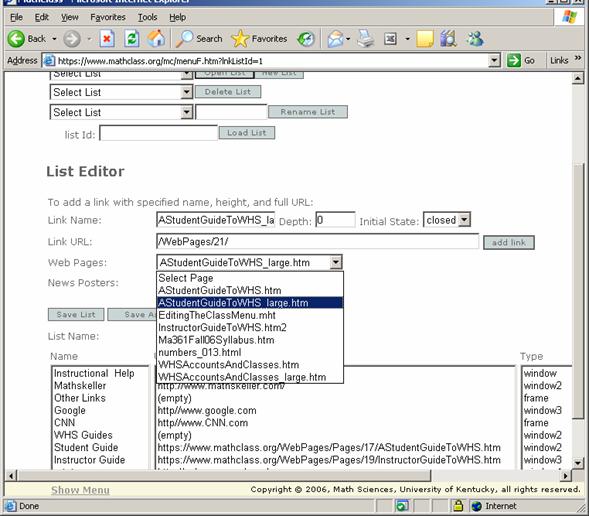
When opened this is what you see. The easiest way to build a list is to start with one. You can use any existing list (regardless of who made it) as a template provided you know the list ID. The ID of the “Instructional Help” list installed above is “11”. Simply enter the “list ID” textbox and press “Load List”
Adding and editing links
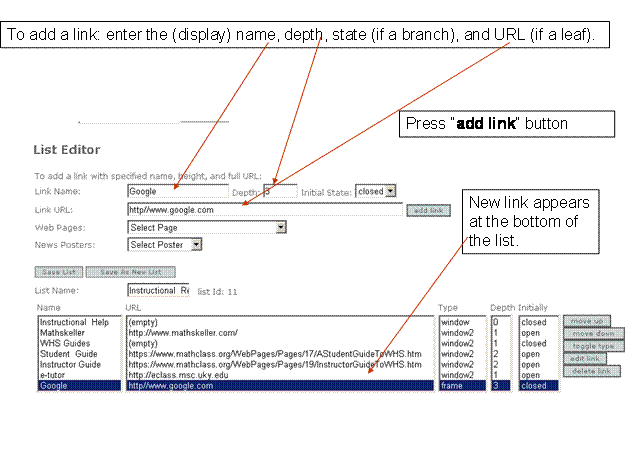
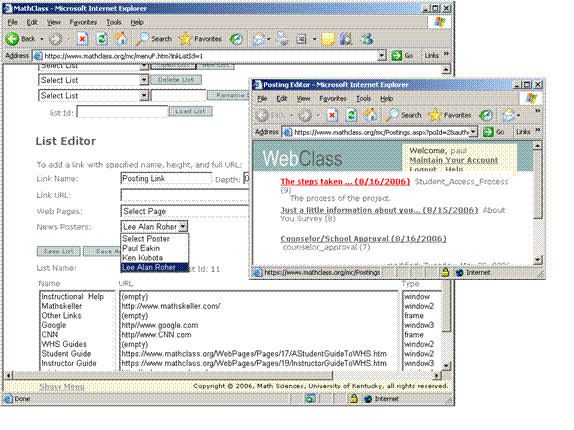
Pages uploaded at Tools -> Page Up/Downloads and postings from Tools->Posting Editor can be easily linked to items in the list editor.
- To create a link to one of your Web Page uploads simply select Web page from the “Web Pages” selection box.
- To
locate a posting to link to select the author at the “News Posters” menu. A page of links to the author’s
postings will appear. The link URL is captured and written or
(preferably) pasted into the “Link
URL” line.
Paul Eakin
Aug 18, 2006